App Uploads
Before you can automate mobile tests in CI, you need an iOS Simulator build or Android APK/APKS to test against.
Build and upload a mobile app with TesterArmy CLI
You are working in a mobile app repository. Build a TesterArmy-compatible mobile artifact and upload
it with the TesterArmy CLI.

Before running commands:

* Inspect the repository structure and identify whether this is an iOS, Android, Expo, or React Native project.
* Do not upload an `.ipa`, `.aab`, or `.xapk`.
* Use an iOS Simulator `.app` build for iOS, or an emulator-runnable `.apk` / `.apks` for Android.
* Do not hard-code API keys or project IDs in committed files.
* Check whether `TESTERARMY_API_KEY` and `TESTERARMY_PROJECT_ID` are already available in the environment.

For iOS:

1. Build a release iOS Simulator app. If this is an Expo / React Native project, run `npx expo prebuild --platform ios` first when native files need to be generated.
2. Prefer uploading the raw `.app` directory with the CLI. The CLI can zip it for you.
3. If a zipped artifact is required, zip the `.app` bundle with the app bundle at the archive root.

For Android:

1. Build a release APK, or use an existing release `.apks` split APK archive.
2. If this is an Expo / React Native project, run `npx expo prebuild --platform android` first when native files need to be generated.
3. Do not upload an Android App Bundle (`.aab`) or `.xapk`.

Upload the artifact:

```bash
mkdir -p .testerarmy

testerarmy upload-app \
  --app-path <path-to-app-artifact> \
  --project "$TESTERARMY_PROJECT_ID" \
  --output .testerarmy/upload.json
```

If this is a temporary CI upload, add `--remove-after 3600`.

After uploading:

* Print the uploaded app ID from `.testerarmy/upload.json`.
* Tell the user which artifact path was uploaded.
* Tell the user whether the artifact was iOS or Android based on the file type.
* Do not run mobile tests unless the user explicitly asks you to.
What you need to upload
iOS
Android
Upload an iOS Simulator build as .app.zip or .zip (archive a .app bundle at the zip root). The CLI can also accept a raw .app directory and zip it for you.
Simulator builds only
Do not upload an .ipa. That is a device build. TesterArmy needs a .app
bundle built for iOS Simulator with the .app directory at the archive root.
Build for iOS Simulator
If you already have an Xcode project, build a simulator app with xcodebuild:
The simulator app bundle usually ends up here:
If you are using Expo / React Native, the mobile example app is a good reference. Its build flow looks like this:
Zip the .app bundle
For dashboard uploads and the presigned API upload flow, archive the .app bundle after the build completes:
You should end up with a file like MyApp.app.zip whose top-level entry is MyApp.app/, not Payload/MyApp.app/.
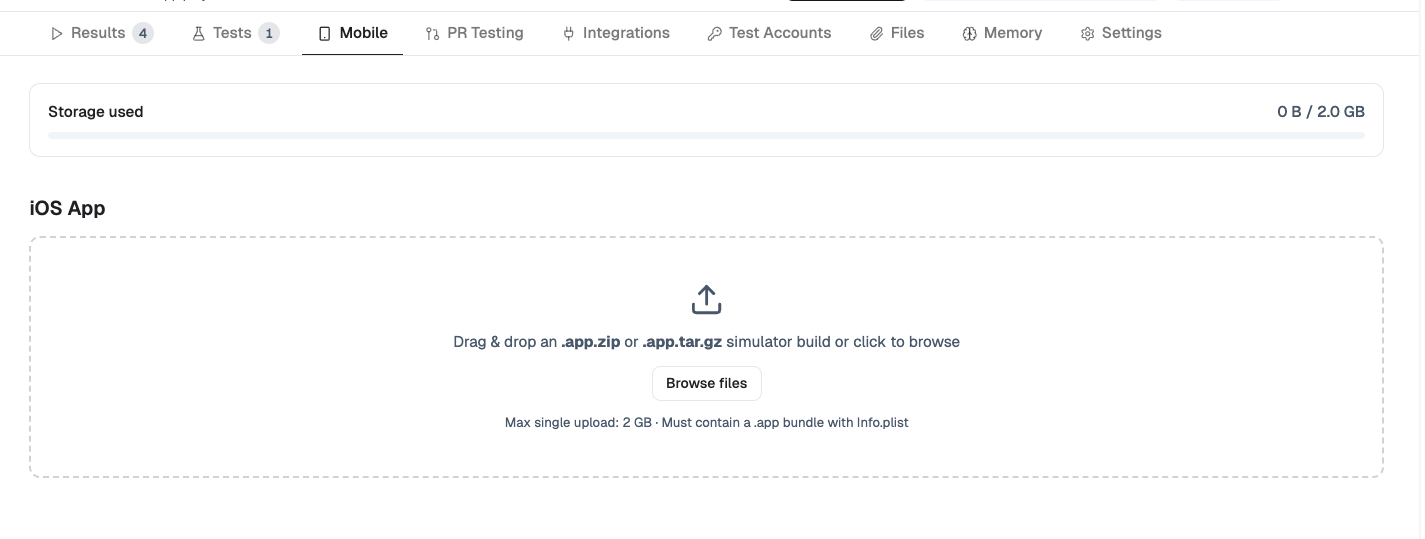
Upload via the dashboard
Go to your project and click the Mobile tab. Then click Browse Files and select your .app.zip, .apk, or .apks.
TesterArmy uploads the artifact to temporary storage first, validates the bundle metadata, and then promotes the validated artifact into your project. If validation fails, the temporary upload is removed and no project app is created.
Upload via the API
For large artifacts, use the three-step presigned flow that streams the bytes straight to storage:
POST /v1/projects/{projectId}/mobile/uploadwith{ filename, fileSize }. The response includes anuploadUrlandstorageKey.PUTthe archive bytes touploadUrl.POST /v1/projects/{projectId}/mobile/upload/confirmwith the samestorageKey,filename, andfileSize, plus optionalremoveAfter.
The presigned URL writes to temporary storage. The confirm step validates the artifact and promotes it into project storage; failed validation deletes the temporary object.
See the API reference.
The direct multipart upload (POST /v1/projects/{projectId}/mobile) remains supported for existing integrations.
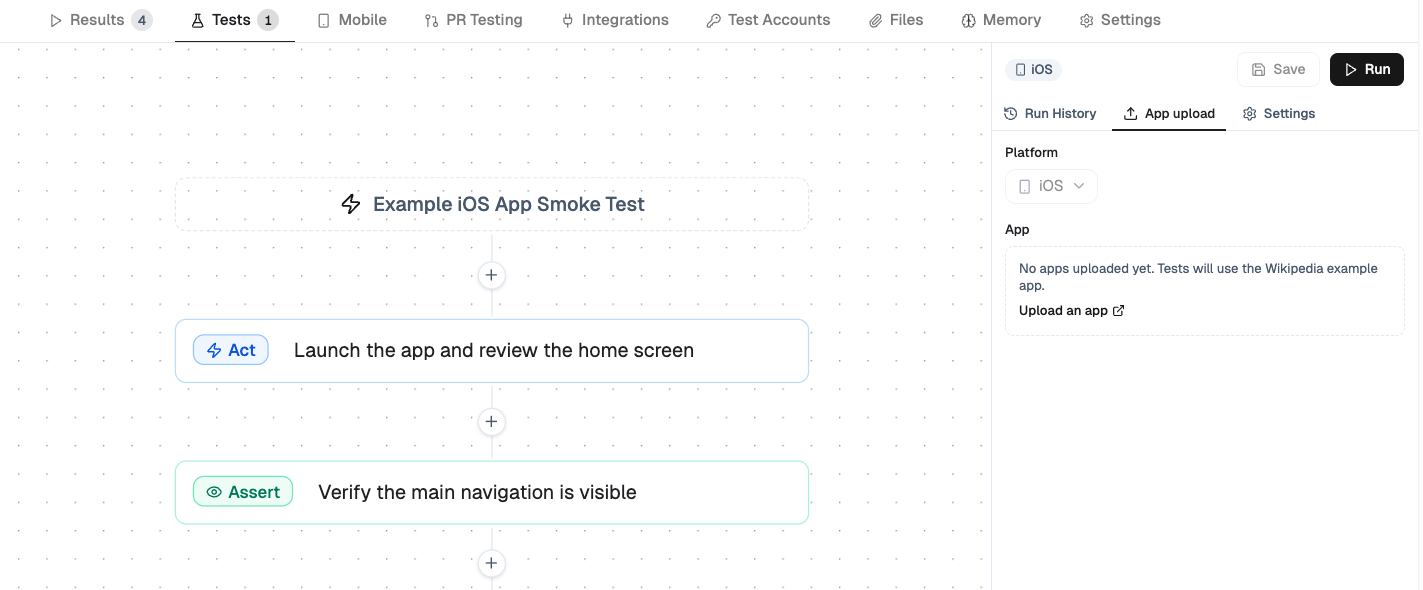
Create your first mobile test
Before adding CI, create at least one mobile test in the dashboard:
- Upload your simulator build.
- Create a new test or open an existing one.
- In the test’s App Upload tab, select the uploaded app.
- Run the test manually and make sure it passes.
When writing prompts, guide the agent like you would guide a human user.
Weak prompt example: “Open settings”
Strong prompt example: “Tap the profile icon in the top right, open Settings, and verify the notifications toggle is visible”
Specific prompts produce more reliable tests and make CI failures easier to understand.
Upload with the CLI
The TesterArmy CLI can upload a raw .app directory, an .app.zip, an .apk, or an .apks. Raw .app directories are packed for you with the app bundle at the archive root:
--app-path and --project are required.
For temporary CI uploads, you can set removeAfter in seconds:
Use --output ./result.json to write the JSON payload to a specific file, or
--output ./artifacts/ to write ta-app-upload-<date>.json inside a directory.
The command rejects .ipa archives.
It also rejects Android .aab and .xapk bundles.
If you use Expo EAS, see Expo EAS for the full workflow that builds the mobile app artifact, downloads it, uploads it, and runs TesterArmy tests.
Notes
- Use
removeAfterto auto-delete temporary uploads created during CI. - Each project has a 2 GB storage limit.
- Auto-delete Oldest App is enabled by default: when a new upload would exceed the storage limit, TesterArmy automatically deletes the oldest uploaded app to make room. Apps used by queued or running tests are never auto-deleted. Disable the toggle in the project’s Mobile tab to have over-limit uploads rejected instead.
- Our GitHub Action can upload the
.appdirectory directly, so you do not need to zip it when running through GitHub Actions. - Android uploads require workspace-level Android support to be enabled.